Wanna get back your deleted or lost contacts from iPhone? If you have backed up your iOS data with iTunes or iCloud regularly, you can recover data from the latest backup quickly. However, there are some limitations about iTunes and iCloud backup you should know.
- Cannot recover the newly-added contacts selectively.
- You may encounter data overwritten errors.
- It is not convenient to recover several contacts.
Well, this article aims to show you 3 easy methods to recover deleted contacts from iPhone. No matter which contact recovery method you choose, you can get the detailed steps and analyzations here. Now, let’s read together to recover iPhone contacts step by step.
Situation 1: When You Have Backed Up iPhone Contacts with iTunes Before
Step 1: Connect iPhone to iTunes
Use a lightning USB cable to connect iPhone to your computer. Sooner, iTunes can recognize your iOS device automatically. So choose the small iPhone icon on the top.
Step 2: Recover deleted iPhone contacts with iTunes
You will locate the default “Summary” page. Click “Restore iPhone…” under the “Backups” section. Browse all your iTunes backups, then select the most relevant one. Later, follow the on-screen instruction to recover deleted contacts from iPhone with iTunes.
Pros:
- It is a free data recovery method you can head to.
Cons:
- Other files stored on your iPhone will be overwritten simultaneously.
- You cannot recover deleted contacts from iPhone selectively.

Situation 2: If You Have Backed Up iPhone Contacts with iCloud Before
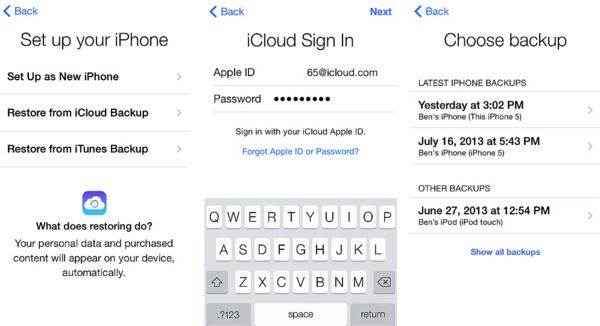
Step 1: Head to iPhone Settings
Open “Settings” app on your iOS device. Choose “General” from the list. Then select “Storage & iCloud Usage”. Tap “Manage Storage” to see all iCloud backup files. Select the one that may contain your deleted contacts.
Step 2: Reset iPhone to factory settings
Check if you have backed up other important iOS files or not. Then choose “Reset” from the “General” list. Now tap “Erase All Content and Settings” to factory reset your Apple device.
Step 3: Restore contacts on iPhone from iCloud
Wait for a while to complete the process. Later, your iPhone will set up as a new one. So follow the on-screen instruction to restore iPhone from iCloud backup. Well, you can get back deleted contacts and other files from that iCloud backup at the same time.
Pros:
- You can use iCloud backup to retrieve deleted contacts on iPhone without computer.
Cons:
- Before recovering deleted contacts, you need to factory reset your iPhone to the empty state.
- Not support to recover the selected files from the iCloud backup to your iPhone.
Situation 3: What If You Lost Contacts before Backing Up from iPhone (H2)
By using Aiseesoft FoneLab iPhone Data Recovery, you can recover deleted contacts from iPhone safely and selectively. To be more specific, you can get 3 choices to get back almost all iOS data while maintaining the security of other files. Different from common data recovery tools, you can extract certain file from your iTunes or iCloud backup. Thus, there is no need to recover iPhone from the entire backup.
- Recover deleted data from iPhone, iTunes and iCloud selectively and safely.
- Wide support of recoverable data types and output formats.
- Get a preview window to check any existing or deleted file.
- Bypass all data loss situations, such as accidental deletion, factory reset, system problem, etc.
- Highly compatible with iOS 12 and iPhone X/8 Plus/8/7 Plus/7/SE/6s Plus/6s/6 Plus/6 and more.
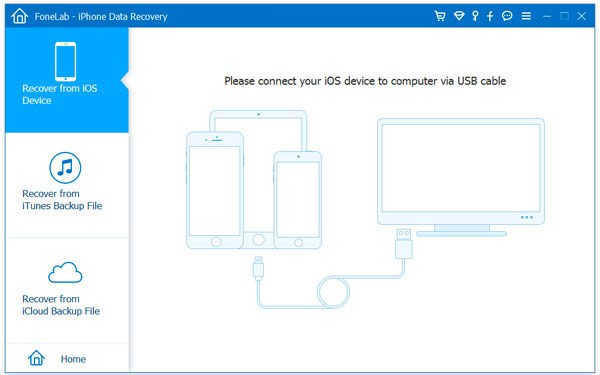
Step 1: Launch Aiseesoft Data Recovery
Free download and install Aiseesoft Data Recovery on your Windows or Mac computer. Later, plug your iPhone into the computer with a proper USB cable. You will be in the default “Recover from iOS Device” section.
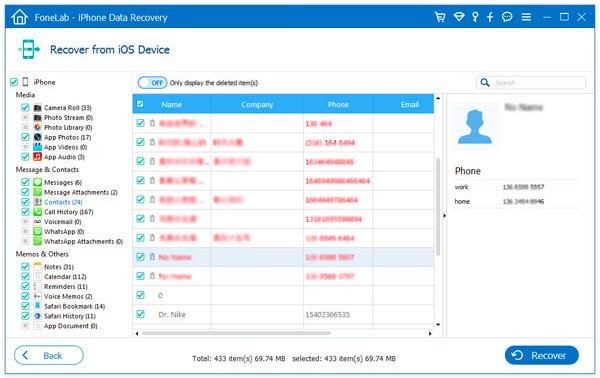
Step 2: Scan your iPhone
Once the Apple smartphone is detected, you can click “Start Scan” on its main interface. Just follow the on-screen instruction to complete the scanning process. Sooner, you can see all files displaying in categories.

Step 3: Recover the selected iPhone contacts
Choose “Contacts” in the left panel. Then select any contact you want to recover with a preview window. Mark before the deleted item you want to get back. Finally, you can click “Recover” to recover deleted contacts from iPhone without backup.
Pros:
- There is one more choice for recovering deleted iPhone contacts without backup.
- It is supported to preview and select the file before recovery.
Cons:
- You cannot complete the data recovery process without a computer.
Actually, you can also run Aiseesoft iPhone Data Recovery to selectively recover contacts from iTunes backup or iCloud backup quickly. Just free download and have a try right now.
The post 3 Ways to Recover Deleted Contacts from iPhone (iOS 12 Supported) appeared first on Blogtrepreneur.
from: Blogtrepreneur
via Blogtrepreneur
Source: 3 Ways to Recover Deleted Contacts from iPhone (iOS 12 Supported) Via Business Advice.
Comments
Post a Comment